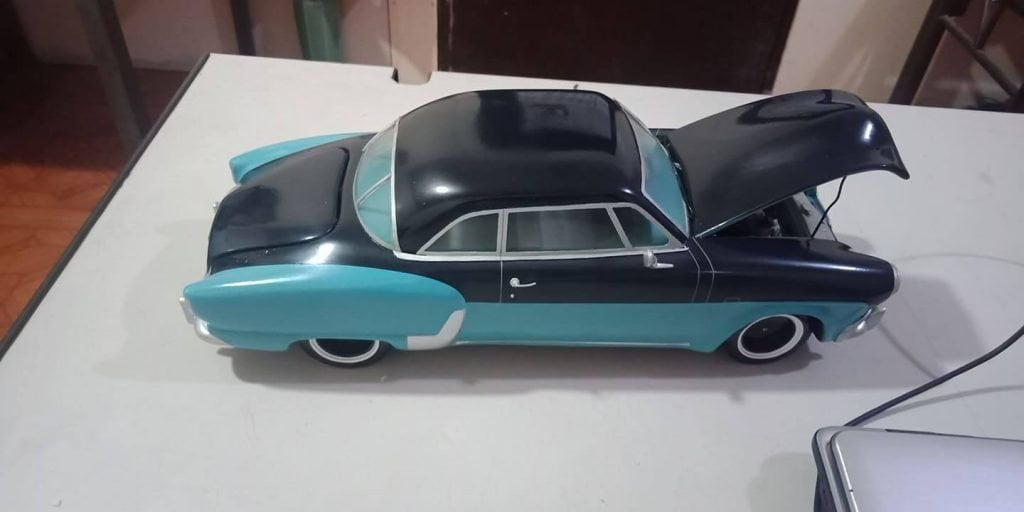
Customizing model cars is an exciting and rewarding hobby that allows enthusiasts to bring their unique visions to life. Whether you’re enhancing a die-cast car or assembling a plastic kit, customization offers endless creative possibilities. From intricate paint jobs to custom bodywork, the process can be as simple or complex as you desire. Here’s a comprehensive step-by-step guide to help you customize your model car like a pro.

Step 1: Choose Your Model
Before diving into customization, choose the right model car to work on:
- Select the Scale: Model cars come in various scales, such as 1:18, 1:24, or 1:64. Choose a scale that suits your workspace and skill level.
- Pick the Base Model: Decide whether you want to customize a pre-assembled die-cast car or build a kit from scratch. Beginners may find plastic kits easier to modify.
- Assess Your Goals: Consider the type of customization you want, such as changing the paint, adding decals, or modifying body features. A simpler model is ideal for first-time customizers.
Step 2: Plan Your Design
Planning your project is crucial for achieving a cohesive look. Take the following steps:
- Research Inspiration: Browse real cars, other model builds, or online forums for ideas. Focus on elements like paint schemes, decals, and body modifications.
- Sketch Your Customizations: Create a rough sketch of your design. Include details like new paint colors, body modifications, and interior changes.
- Gather Reference Materials: Collect photos, blueprints, or diagrams for precise detailing.
Step 3: Gather Tools and Materials
Having the right tools and materials ensures a smooth customization process. You’ll need:
- Tools: X-Acto knives, fine sandpaper, mini screwdrivers, tweezers, masking tape, and small files.
- Painting Supplies: Primer, acrylic or enamel paints, clear coat, brushes, airbrush kits, and paint masks.
- Modeling Materials: Plastic sheets, putty, glue, decals, and replacement parts like wheels or spoilers.
- Protective Gear: Gloves, goggles, and a mask for safe handling of paints and adhesives.
Step 4: Prepare the Model
Proper preparation is key to a flawless finish:
- Disassemble the Car: Carefully take apart the model using small screwdrivers or prying tools. Note where each part belongs.
- Clean the Parts: Wash the components with mild soap and water to remove dirt or grease. Let them dry completely.
- Sand the Surfaces: Lightly sand areas that will be painted or glued. This helps the paint adhere and creates a smooth surface.
Step 5: Modify the Bodywork
Customizing the body of your model car can dramatically change its appearance:
- Reshape or Add Features: Use plastic sheets or putty to create spoilers, scoops, or flared fenders. Cut and file these additions to match your design.
- Smooth Transitions: Sand and blend the modified areas for a seamless look. Use fine-grit sandpaper for best results.
Step 6: Paint the Model
Painting is one of the most rewarding parts of customization:
- Apply Primer: Start with a thin coat of primer to create a uniform base. Allow it to dry completely.
- Base Color: Spray or brush on the primary color. Use multiple thin coats to avoid drips and ensure even coverage.
- Detail Work: Paint smaller areas like trim, grilles, or emblems using fine brushes or masking techniques.
- Seal with Clear Coat: Protect your work with a clear coat for added shine and durability.
Step 7: Enhance the Interior
Don’t neglect the inside of your model car:
- Paint Interior Features: Add color to seats, dashboards, and door panels to match your vision.
- Install Accessories: Enhance realism with custom steering wheels, floor mats, or gauges. Use reference photos for accuracy.
Step 8: Customize Wheels and Tires
The wheels are a crucial part of your car’s look:
- Replace or Modify Wheels: Swap out the existing wheels for custom rims or repaint them for a fresh appearance.
- Add Tire Details: Use paint markers to highlight tire lettering or add weathering effects for realism.
Step 9: Apply Decals and Graphics
Decals can add professional flair to your model:
- Cut and Soak Decals: Trim decals to size and soak them in water until they slide off the backing paper.
- Position and Secure: Carefully place the decals on the car. Use a decal-setting solution to eliminate bubbles and ensure proper adhesion.
Step 10: Reassemble the Model
Once all customizations are complete, it’s time to put the car back together:
- Reattach Parts: Assemble the model carefully, ensuring all parts fit securely. Use glue sparingly if needed.
- Test Movable Features: If your model includes functional doors, hoods, or wheels, ensure they still operate smoothly.
Step 11: Display Your Model
Show off your hard work with a thoughtful display:
- Polish for Shine: Give your model a final polish to remove fingerprints and enhance its appearance.
- Create a Scene: Consider placing your car on a custom diorama or inside a display case for added effect.
Tips for Success
- Patience is Key: Rushing can lead to mistakes. Take your time to achieve the best results.
- Practice Techniques: Experiment with painting, decal application, and bodywork on spare parts before working on your model.
- Learn from Others: Join online forums or local clubs to exchange tips and ideas with fellow enthusiasts.
Customizing model cars is a fantastic way to combine artistry and engineering on a small scale. With practice and creativity, you can transform any model into a stunning, one-of-a-kind masterpiece. Whether it’s your first project or your fiftieth, the joy of seeing your customized creation is always worth the effort.
 Sports Craft Cars